

















































How To Grout Tiles
It can be daunting undertaking DIY projects but all you need is guidance and a little bit of confidence. To this rule, grouting is no exception!
Grouting is the application of an adhesive (grout) which is used to fill gaps. Grout is usually a mixture of cement, sand, water and/or chemicals which form a waterproof seal in between tiles. It can also be used for repairing concrete cracks and for soil stabilization.
Grouting is effective and, once you know how to do it, straightforward. Whether you’re looking to finish off your bathroom with some plush porcelain wall tiles, or want a variety of quirky shapes to add a cool, unique finish, our guide will give you confidence that once you’ve found the perfect tile design, you can then fit them yourself.
Below is our simple guide to grouting!
Here’s what you’re going to need:
- Tub of grout/adhesive
- Squeegee or plastic spreader
- Sponge
- Bucket
- Polish
- Cloth
Which grout should I use?
It’s important to know which grout will work best for you and this depends on the area of the house you are grouting. There are four main types of grout:
Cement-based grout is often used for DIY tile projects. Though slightly weaker than epoxy grout, cement-based grout is easier to work with.
Epoxy grout, while more expensive, is very effective for tiles that require a high degree of water resistance (bathroom tiles).
Latex-modified sanded cement grout is similar to regular cement-based grout, but is more resistant to water and has better bonding characteristics, making it great for both bathrooms and countertops.
Caulking grout is easy to use as it can simply be squeezed from a tube by hand or fitted into a caulking gun for greater control and precision. Caulking grout is great for finishing touches and filling in tough-to-reach corners.
Clean the tile joint
The first step is to ensure that the tile joint is clear of any dust, moisture, adhesive, or any other debris before you begin to grout. The very purpose of grouting is to fill those spaces once and for all with a paste that will harden into a waterproof seal.
Both dust and old grout pieces can prevent a good set, so giving them a thorough clean – even if you are working with brand new tile – is crucial. Failure to do so could leave the finish looking uneven and allow water to pass through.
Preparing your grout
If you’re using a powdered grout, pour water into a bucket and then add your grout to it. Use a stick to stir until the grout assumes the consistency of creamy peanut butter or whipped ice cream. Once you have achieved this, you’re ready for the next step!
Applying the grout
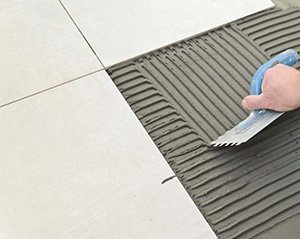
Place some grout on the tiles using your squeegee/plastic spreader. Hold the squeegee/plastic spreader at a 45° angle – this helps towards a smoother, cleaner finish – and apply the grout into the necessary areas. Ensure that all the joints are filled.
Cleaning the surface
Using a dampened sponge (not a wet one), clean the surface diagonally to the grout lines. Be careful that you don’t overwash the grout joints by applying too much pressure, as this will remove the pigment from the surface of the grout and leave behind unsightly white patches which can be difficult to get rid of.
Sealing the grout
Sealing all the joints is essential as this is what makes it waterproof. Make sure you are using the proper grout sealer for the project and always read the instructions before applying. Seal the joints with two applications. Make sure you wipe away any drips off the tile, as some tiles will be sensitive to this.
Once you’ve done this, leave the grout to dry (check the recommended time for your grout of choice as this can vary). Once dry, simply polish with a cloth! Easy, right?
Feeling confident? Why not check out our range of tiles and put your new skills into practice?
Read more from us
May 21st 2015 | 4 min read | By Owen